
In Exchange 2007 and later, Exchange Setup creates a self-signed certificate to protect communication with Exchange services such as SMTP, IMAP, POP, OWA, EAS, EWS and UM.
Exchange’s self-signed certificates meet an important need – securing communication paths for all Exchange services by default.
The self-signed certificate meets an important need – securing communication paths for all Exchange services by default. This is a great development – it ensures that out of the box, Exchange does not transfer any data in the clear and all communication is encrypted.
Nevertheless, one should treat these certificates as temporary. Although self-signed certificates work perfectly well for internal SMTP communication between Hub Transport servers, and between Hub Transport and Edge Transport servers, it’s not recommended to use them for any client communication on an ongoing basis. For most deployments, you will end up purchasng a certificate from a trusted public CA (or perhaps an internal CA in organizations with PKI deployed). See the Certificates and Certification Authorities secton for more info.
Should you decide to leave the self-signed certificate(s) on some servers and continue to use them, you would need to renew them when they expire — just as you would renew certificates from public or private CAs. The good news is that with Exchange 2010, Microsoft raised the validity of Exchange’s self-signed certificates to five years, so most organizations wouldn’t need to renew them frequently. In Exchange 2007, the self-signed certificate is valid for one year.
- Copy the thumbprint from existing self-signed certificate: This command retrieves the existing certificate for server postcard.e15labs.com:
Get-ExchangeCertificate -Domain postcard.e15labs.com | fl
Note the services the certificate is enabled for (by default: POP, IMAP, IIS, SMTP on CAS + HT servers). Copy the thumbprint of the certificate.
- Generate a new self-signed certificate: This command pipes the existing certificate object to the New-ExchangeCertificate cmdlet, which uses its properties to generate a new self-signed certificate.
Get-ExchangeCertificate -thumbprint “C5DD5B60949267AD624618D8492C4C5281FDD10F” | New-ExchangeCertificate
Exporting a certificate with its private key
If you want to be able to export a certificate with its private key for backup or to install it on another server (although this is generally done only for CA-signed certificates), create the new certificate with an exportable private key by using the PrivateKeyExportable parameter. For example:
New-ExchangeCertificate -PrivateKeyExportable $trueIf the existing certificate is being used as the default SMTP certificate, you will get the following prompt. The default SMTP certificate is used to encrypt SMTP sessions between transport servers in your organization.
Confirm
Overwrite existing default SMTP certificate,
‘C5DD5B60949267AD624618D8492C4C5281FDD10F’ (expires 5/13/2013 7:20:34 AM), with certificate ‘3DA55740509DBA19D1A43A9C7161ED2D0B3B9E3E’ (expires 5/13/2018 7:37:31 AM)?
[Y] Yes [A] Yes to All [N] No [L] No to All [S] Suspend [?] Help
(default is “Y”):Type y to continue. A new certificate is generated.
Thumbprint Services Subject
———- ——– ——-
3DA55740509DBA19D1A43A9C7161ED2D0B3B9E3E ….. CN=Postcard - Enable the new certificate for IIS: The old certificate is enabled for IIS, POP, IMAP and SMTP. The new certificate generated using the above command is enabled only for POP, IMAP and SMTP – IIS is missing. You can enable the certificate for IIS (in addition to any other services it may already be enabled for — it adds to existing values of the certificate’s Services property).
Before you enable a certificate for an Exchange service
Before you enable a certificate for a particular Exchange Server service such as IIS (which enables it for all HTTPS services – Outlook Anywhere (RPC over HTTPS), OWA, EAS, and EWS), know that it’s a one-way street. There’s no way to disable the certificate (for that service). Setting the Services parameter to None does not do anything in this case.
The workaround: Remove the certificate. If it’s a CA-issued certificate, remember to export it with its private key before you remove it, and then import it again and enable it for the Exchange services you need to. If the certificate is self-signed, it shouldn’t be a concern — you can generate as many self-signed certificates as you want.
To enable the certificate for IIS:
Enable-ExchangeCertificate -thumbprint “3DA55740509DBA19D1A43A9C7161ED2D0B3B9E3E” -services IIS
- Remove the old certificate: Test services are working with the new certificate. If it works as expected, you can remove the old certificate using the EMC or the Remove-ExchangeCertificate cmdlet from the Shell.:
Remove-ExchangeCertificate -thumbprint “C5DD5B60949267AD624618D8492C4C5281FDD10F”
The new certificate is generated and enabled. Examine the new certificate:
Get-ExchangeCertificate -thumbprint “3DA55740509DBA19D1A43A9C7161ED2D0B3B9E3E” | fl
Certificates and Certification Authorities
Digital certificates are signed by certification authorities (CAs) that issue them. They can be classified into three types based on who signs them.
- Certificates signed by public CAs: Public CAs provide certification services, generally for a fee (although there are non-commercial public CAs), to the public. A public CA is generally trusted by device operating systems. It’s recommended to use certificates issued by a public CA for public services (including public web sites) and private services in mid/large organizations that don’t have an internal CA.
- Certificates signed by private CAs: Many organizations set up a private CA to issue certificates internally or to members of a private group. Windows Server has included Certificate Services since many versions. This allows IT departments to control certificate issuance/revocation to their devices and users. Devices controlled by the organization (for example, computers that are part of the org’s Active Directory domain) can be configured to trust the org’s internal CA.
Note: Internet standards make no distinction between certificates signed by public CAs and private or internal CAs.
- Self-signed certificates: Self-signed certificates are signed by the device or service itself. Exchange Server 2007 and later create a self-signed certificate during Exchange setup. By default, self-signed certificates are not trusted by anyone but the device/service that creates it. Most browsers alert users about untrusted certificates when they visit a site using HTTPS.
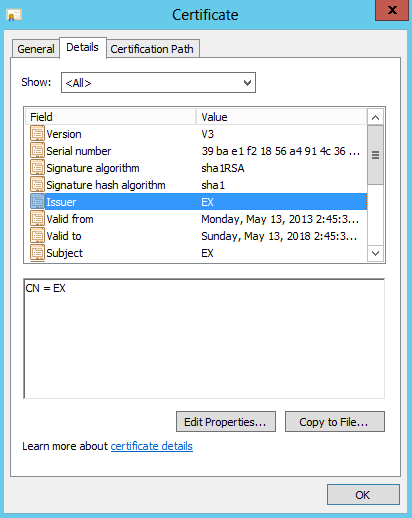
Figure 1: A self-signed certificate created by Exchange Server setup
Self-signed certificates are great for securing communication by default and handy for test environments. For client communication in production environments, it’s recommended to use certificates signed by a trusted CA. The cost of certificates from public CAs has come down significantly over the years. Most small and many mid-size organizations find it much more cost-effective to use a public CA.
Related posts:
[…] Exchangepedia | Renewing self-signed … – Exchange 2010 and Exchange 2007 Setup creates a self-signed certificate for the server to protect communication with services like SMTP, IMAP, POP, IIS and UM. […]
Thanks!
Is this applicable to Exchange 2013??
Thank you very much…
Yes.
Hi Bharat,
Is this applicable if We have our own INTERNAL CA Server?? the Certificate is about to expire, the certificate is from Internal CA server. Please guide me which steps to follow and what is the correct one to follow. We have 2 Exchange 2013 Server in DAG. This is our first renewal of Certificate to this Exchange 2013 server.
Awaiting for your reply…
If you’re using a certificate issued by your internal Certification Authority (CA), you’d need to request a new certificate from it. See Renew an Exchange 2016 certificate > Renew a certificate that was issued by a certification authority. The command:
Get-ExchangeCertificate -Thumbprint | New-ExchangeCertificate -GenerateRequest -RequestFile \.req
This article explains better the relationship between the Public cert and the Self-Signed certs.
http://www.msexchange.org/articles-tutorials/exchange-server-2013/management-administration/managing-certificates-exchange-server-2013-part1.html
or search “site:msexchange.org managing certificates exchange server 2013”
Thanks for the feedback. This article isn’t meant to be an exhaustive reference on certificates.
Written by an idiot again, why you need write down what steps you took, did u use a command line? what if you don’t know domainname and so on. U know it wastes our time no? :|
If you don’t know your domain name you shouldn’t be allowed near a server.
Hello Bharat,
When I try to create a new certificate, I get the following error:
WARNING: An unexpected error has occurred and debug information is being generated: Name 192.xxx.xxx.3 is not a valid DNS name.
Parameter name: names
New-ExchangeCertificate : Name 192.xxx.xxx.3 is not a valid DNS name.
Parameter name: names
At line:1 char:105
+ get-exchangecertificate -thumbprint “F7E167FCDED8B6E980741399C1056A8E2BFE2FC1” | new-exchangecertificate <<<< -privatekeyexportable $true
the certificate appears with the get-exchangecertificate command but does not create the exportable key and does not appear to function.
Please help!
Mike
I’m not sure how it would have happened in the first place, but you cannot issue a certificate to an IP address. In the Exchange Management Console, you can view your current certificate (Server Configuration). The “Subject” column will tell you what to enter as your CN on the new certificate. Generally speaking, this should be the FQDN of the external WAN (IE: mail.company.com). If you’re attempting to use Outlook Anywhere, this MUST be the case. This said, you can also use the NetBIOS name of the exchange server in many cases (though generally not recommended).
You can also issue a new certificate and replace an old one using the following commands in the Exchange Management Shell:
New-ExchangeCertificate -PrivateKeyExportable $True -Services”IMAP,POP,IIS,SMTP” -SubjectName “cn=mail.company.com”
Enable-ExchangeCertificate -Thumbprint [NEW THUMBPRINT THAT WAS JUST OUTPUT] -Services “IMAP,POP,IIS,SMTP”
That’s it! Worked in 2007, still works in 2010. You can view the status of the new cert in the Management Console under Server Configuration.
Good
Worked great on 2013 Exchange except I had to run the Get-ExchangeCertificate without the -Domain parameter.
Thanks!
Thank you Bharat,
Worked great except I had to run the Get-ExchangeCertificate without the -Domain parameter.
Note 1.Don’t forget step 3 otherwise you will get Event 2501, 2601 and 2605 MSExchange ADAccess errors.
Note 2. Run Step 3 again (Enable-ExchangeCertificate with public SSL cert thumbnail) to enable your Original Public SSL cert in IIS.
Check the owa page to verify the correct cert is being used.
Thanks for the feedback and update!
Hi, I recently renewed the Microsoft Exchange self signed certificate and followed the instruction I have read online.
I am no exchange expert and found it a daunting task. The certificate renewed easily enough but soon found that I could
not access the Management shell or the ECP.I found that the binding of the new certificate in IIS was reset and needed to be reinstated.
Found the solution here – https://supertechman.com.au/how-to-renew-the-exchange-self-signed-certificate/