In Exchange 2007 and later, Exchange Setup creates a self-signed certificate to protect communication with Exchange services such as SMTP, IMAP, POP, OWA, EAS, EWS and UM.
Exchange’s self-signed certificates meet an important need – securing communication paths for all Exchange services by default.
The self-signed certificate meets an important need – securing communication paths for all Exchange services by default. This is a great development – it ensures that out of the box, Exchange does not transfer any data in the clear and all communication is encrypted.
Nevertheless, one should treat these certificates as temporary. Although self-signed certificates work perfectly well for internal SMTP communication between Hub Transport servers, and between Hub Transport and Edge Transport servers, it’s not recommended to use them for any client communication on an ongoing basis. For most deployments, you will end up purchasng a certificate from a trusted public CA (or perhaps an internal CA in organizations with PKI deployed). See the Certificates and Certification Authorities secton for more info.
Should you decide to leave the self-signed certificate(s) on some servers and continue to use them, you would need to renew them when they expire — just as you would renew certificates from public or private CAs. The good news is that with Exchange 2010, Microsoft raised the validity of Exchange’s self-signed certificates to five years, so most organizations wouldn’t need to renew them frequently. In Exchange 2007, the self-signed certificate is valid for one year.
- Copy the thumbprint from existing self-signed certificate: This command retrieves the existing certificate for server postcard.e15labs.com:
Get-ExchangeCertificate -Domain postcard.e15labs.com | fl
Note the services the certificate is enabled for (by default: POP, IMAP, IIS, SMTP on CAS + HT servers). Copy the thumbprint of the certificate.
- Generate a new self-signed certificate: This command pipes the existing certificate object to the New-ExchangeCertificate cmdlet, which uses its properties to generate a new self-signed certificate.
Get-ExchangeCertificate -thumbprint “C5DD5B60949267AD624618D8492C4C5281FDD10F” | New-ExchangeCertificate
Exporting a certificate with its private key
If you want to be able to export a certificate with its private key for backup or to install it on another server (although this is generally done only for CA-signed certificates), create the new certificate with an exportable private key by using the PrivateKeyExportable parameter. For example:
New-ExchangeCertificate -PrivateKeyExportable $trueIf the existing certificate is being used as the default SMTP certificate, you will get the following prompt. The default SMTP certificate is used to encrypt SMTP sessions between transport servers in your organization.
Confirm
Overwrite existing default SMTP certificate,
‘C5DD5B60949267AD624618D8492C4C5281FDD10F’ (expires 5/13/2013 7:20:34 AM), with certificate ‘3DA55740509DBA19D1A43A9C7161ED2D0B3B9E3E’ (expires 5/13/2018 7:37:31 AM)?
[Y] Yes [A] Yes to All [N] No [L] No to All [S] Suspend [?] Help
(default is “Y”):Type y to continue. A new certificate is generated.
Thumbprint Services Subject
———- ——– ——-
3DA55740509DBA19D1A43A9C7161ED2D0B3B9E3E ….. CN=Postcard - Enable the new certificate for IIS: The old certificate is enabled for IIS, POP, IMAP and SMTP. The new certificate generated using the above command is enabled only for POP, IMAP and SMTP – IIS is missing. You can enable the certificate for IIS (in addition to any other services it may already be enabled for — it adds to existing values of the certificate’s Services property).
Before you enable a certificate for an Exchange service
Before you enable a certificate for a particular Exchange Server service such as IIS (which enables it for all HTTPS services – Outlook Anywhere (RPC over HTTPS), OWA, EAS, and EWS), know that it’s a one-way street. There’s no way to disable the certificate (for that service). Setting the Services parameter to None does not do anything in this case.
The workaround: Remove the certificate. If it’s a CA-issued certificate, remember to export it with its private key before you remove it, and then import it again and enable it for the Exchange services you need to. If the certificate is self-signed, it shouldn’t be a concern — you can generate as many self-signed certificates as you want.
To enable the certificate for IIS:
Enable-ExchangeCertificate -thumbprint “3DA55740509DBA19D1A43A9C7161ED2D0B3B9E3E” -services IIS
- Remove the old certificate: Test services are working with the new certificate. If it works as expected, you can remove the old certificate using the EMC or the Remove-ExchangeCertificate cmdlet from the Shell.:
Remove-ExchangeCertificate -thumbprint “C5DD5B60949267AD624618D8492C4C5281FDD10F”
The new certificate is generated and enabled. Examine the new certificate:
Get-ExchangeCertificate -thumbprint “3DA55740509DBA19D1A43A9C7161ED2D0B3B9E3E” | fl
Certificates and Certification Authorities
Digital certificates are signed by certification authorities (CAs) that issue them. They can be classified into three types based on who signs them.
- Certificates signed by public CAs: Public CAs provide certification services, generally for a fee (although there are non-commercial public CAs), to the public. A public CA is generally trusted by device operating systems. It’s recommended to use certificates issued by a public CA for public services (including public web sites) and private services in mid/large organizations that don’t have an internal CA.
- Certificates signed by private CAs: Many organizations set up a private CA to issue certificates internally or to members of a private group. Windows Server has included Certificate Services since many versions. This allows IT departments to control certificate issuance/revocation to their devices and users. Devices controlled by the organization (for example, computers that are part of the org’s Active Directory domain) can be configured to trust the org’s internal CA.
Note: Internet standards make no distinction between certificates signed by public CAs and private or internal CAs.
- Self-signed certificates: Self-signed certificates are signed by the device or service itself. Exchange Server 2007 and later create a self-signed certificate during Exchange setup. By default, self-signed certificates are not trusted by anyone but the device/service that creates it. Most browsers alert users about untrusted certificates when they visit a site using HTTPS.
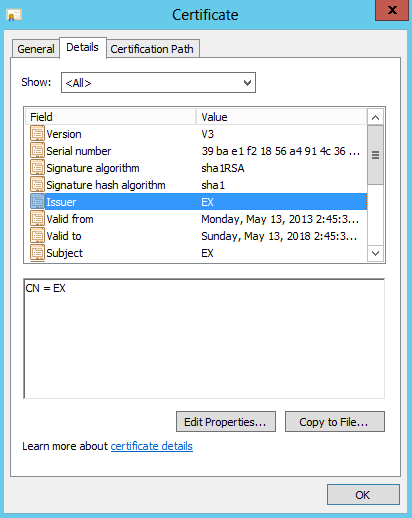
Figure 1: A self-signed certificate created by Exchange Server setup
Self-signed certificates are great for securing communication by default and handy for test environments. For client communication in production environments, it’s recommended to use certificates signed by a trusted CA. The cost of certificates from public CAs has come down significantly over the years. Most small and many mid-size organizations find it much more cost-effective to use a public CA.
Related posts:

{ 44 comments… read them below or add one }
Next Comments →
Hi,
Thanks for the great outline!
Is this the same on an edge server or do you have to resubscribe for that?
Do you know if you can renew a CA cert through IIS or do you have to use the new-exchangecertificate cmd?
Thanks again!!
Thank you for the article. While playing with self-signed certificates I ran into the following problem. It happens for all new certificates. Any idea why it happens and how it can be resolved?..
– – – – – – – – – – – – – – – – – –
>>> New-ExchangeCertificate -GenerateRequest -domainname mydomaain.com -privatekeyexportable:$true -path c:\cert_myserver.txt
Thumbprint Services Subject
———- ——– ——-
433157A3B9C8C874591A5B35CF91719ADC61B427 ….. CN=mydomain.com
>>> Enable-ExchangeCertificate -Thumbprint 433157A3B9C8C874591A5B35CF91719ADC61B427 -Services “IIS”
Enable-ExchangeCertificate : The certificate with thumbprint 433157A3B9C8C874591A5B35CF91719ADC61B427 was not found.
At line:1 char:27
+ Enable-ExchangeCertificate <<<< -Thumbprint 433157A3B9C8C874591A5B35CF91719ADC61B427 -Services "IIS"
Do you see the certificate when you use the Get-ExchangeCertificate command?
Sorry Bharat, just got back from vacation.
Yes, strange thing is – I see it using the Get-ExchangeCertificate command, but it doesn’t let me enable it!
Any idea what might be wrong?..
I have a question concerning renewing the certificate from an outside authority. Let’s say this certificate was from Entrust and you wanted to renew it. Would the correct command be Get-ExchangeCertificate -thumbprint “C5DD5B60949267AD624618D8492C4C5281FDD10F” | New-ExchangeCertificate -GenerateRequest -privatekeyexportable $true -Path c:\certificates\cerreq.req to renew?
Hello…I was just wondering if my last comment was correct as I have to renew my certificate soon. Thanks for the help!
Hello,
I followed the above instructions and I’m not sure this worked correctly. After running Enable-ExchangeCertificate -thumbprint “…” -Services IIS
If I run Get-ExchangeCertificate, it shows my new certificate as being enabled ONLY for IIS… I’ve tried running Enable-ExchangeCertificate -services SMTP (POP, IMAP) with no luck. Email still works, but I’m not sure how to check if Exchange is still using my old certificate.
Please let me know how to check if I am using the new certificate, as well as how to revert so I can try your instructions again.
Thanks!
Hi,
Thank you, this is a superb article. I have a problem, our exchange server does not have a domain name and it works on an IP address. E.f. we access ms outlook using http://123.456.789.123/owa and the outlook anywhere uses this IP. Can you pls advice me on how to create the certiciate for the local domain i.e. exchane.domain.local and IP address.
Thanks & Regards,
Sudhish
Hi –
I have imported a our new certificate and would like to enable it for "SMTP, IMAP, IIS, POP"
When I go to enable I get a big WARNING that I will not be able to use my TLS connectors??
[PS] C:\Documents and Settings\oscar.meyer>
Enable-ExchangeCertificate -ThumbPrint [XXXXX-THUMBPRINT-XXXXXX] -Services "SMTP, IMAP, POP, IIS"
WARNING: This certificate will not be used for external TLS connections with an
FQDN of 'mail1.mymail.com.COM' because the self-signed certificate with
thumbprint 'AAA-THUMBPRINT-AAAAAAA' takes precedence. The
following connectors match that FQDN: Default MAIL1, Client
MAIL1.
Confirm
Overwrite existing default SMTP certificate,
'AAA-THUMBPRINT-AAAAAAA' (expires 1/01/2XXX 2:23:15 PM),
with certificate 'XXXXX-THUMBPRINT-XXXXXX' (expires 2/XX/2XXX
12:34:13 PM)?
[Y] Yes [A] Yes to All [N] No [L] No to All [S] Suspend [?] Help
(default is "Y"):
I did not complete the command – the whole purpose of the CERT is for our TLS connectors to external clients – Do I just have to re-create my connectors once I have enabled the CERT?
Please advise.
Thanks.
-Johnny
Great Article Thank you so much
Luke
Thank you. Worked a treat. Had been sratching my head over this one!
http://paulhale.com
http://twitter.com/paulhale
I have followed step-1 and 2 and renew the certificate. But forgot step-3 to remove expireed certificate. Now, the issue is remains the same. Our outlook clients are still recieving same securiy certificate message.Is it because I did not delete expired certificate.
Thanks.
Thanks a lot guys. Tried the solution posted above and it worked fine for our Exchange 2007 server.
Thanks heaps this worked and now I don't get those event logs anymore relating to invalid Certificates
Hi Bharat,
Maybe you could help me i have my certificate configured as you discribed hier. my user a having this error offlineaddressbookdata can not be found the URL can not befound 0X8004010f.
Using out of office assistant they get the error server is not available
thanks
Bharat,
Thanks for the post. I renewed my cert a month ago, forgot to add IIS. Rebooted this weekend and no webmail. Your post got me back up fast.
Thank you,
Mark
You saved my life – champion.
Excuse me for being such a novice, but what program are you using to do this? Tiny Get? It appears that a couple of peices of this are missing, will anybody please let me know how to accomplish this?
Thank you
These commands are all run from the Exchange Management Shell, aka, Powertoys with the Exchange Extensions….
Can any one guide me how to reinstall default exchange ceritificate after installing third pary certification expiry, because i don't want to pruchse more
Hi,
can anyone guide me how to install default exchange certificate after expiry of third party certificate because i don't want to purchase more.
thanks,
John..
Is your problem solved because me too facing same problem. please let me what you did to solve…
Thanks for this article. Worked a treat!
Worked Perfectly… !! Thnx Mate!
Thanks for a great write up
for anybody that needs instructions:
click on Start and type Exchange Management Shell in the Search field above Start then click on it…
Followed the instructions, was very easy thanks. However now my users are getting the “The security certificate was issued by a company you have not chosen to trust…” Is there a way to remotely add that certificate to users’s trusted area?
Thanks!
Thanks a lot.
Now I know why I cannot use -services none to disable the certificate.
Thanks Mate .You have very good knowledge .
keep it up .
Dear Bharat,
I performed the steps you described. With MMC I exported the certificate, and I imported the certificate on my ISA server Local computer, personal and trusted.
I changed the OWA rule in the ISA server fo the listener to the correct valid certificate.
Now my users still get the message “Error Code: 500 Internal Server Error. The received certificate has expired. (-2146893016) ”
When I watch the certificate at the ISA server it’s valid.
But I did’nt perform the deletion of the invalid certificates as you described under step number 3.
Could this be the problem for my users?
Are services assigned to the new certificate? If so, the old certificate shouldn’t be used, even if installed.
Regardless, you can remove old/expired certificates.
This seemed to screw up SBS 2008 – I dont think you are meant to use this procedure for SBS. If you do OWA will fail and you have to reset various things which were a real pain to find and then you get a Outlook certificate name error which is just as big a pain to fix.
For SBS the advice is to use the ‘Fix my network’ wizard I think.
After wasting a whole bunch of time trying to renew the exchange certificate on SBS 2008 using powershell, MMC, etc, I used your suggestion and ran Fix my network like you suggested and was done in 2 minutes. Thank you very much.
Worked like a charm, thanks!
Can someone please tell me the roll back plan if this all goes wrong?
thanks
Thanks for the post. I still haven’t figured out how to extend the self-signed cert for more than one year, so you don’t have to repeat the process every year.
Can someone shed some light on how to accomplish that? TIA
For Certification Authority-signed certificates, you can specify when requesting from the CA. For self-issued certificates, the one year certificate validity period is hard-coded in Exchange 2007. In Exchange 2010, self-signed certificates are valid for 5 years.
Very good article, saved lots of time. Thanks
worked fine for me (SBS 2008)
thanks
THANK YOU!
This really saved my skin…
Brilliant! Nice and simple. Exactly what we were looking for. Although the cmdlet verbage has changed in 2010 (SBS2011), I still managed to get it completed. Many thanks.
Worked great. And as stated above the command verbage has changed in 2010. Instead of -Domain it is -DomainName
Thanks for your post. Following your instructions made this task simple and straight forward. Kudos to you for sharing!
Is it applicable to 2013 too
Yes, to Exchange 2013 as well. Although the validity of self-signed certificates in Exchange 2013 is 5 years. See Digital certificates and SSL > Self-signed certificates.
{ 10 trackbacks }